Installing Shelves
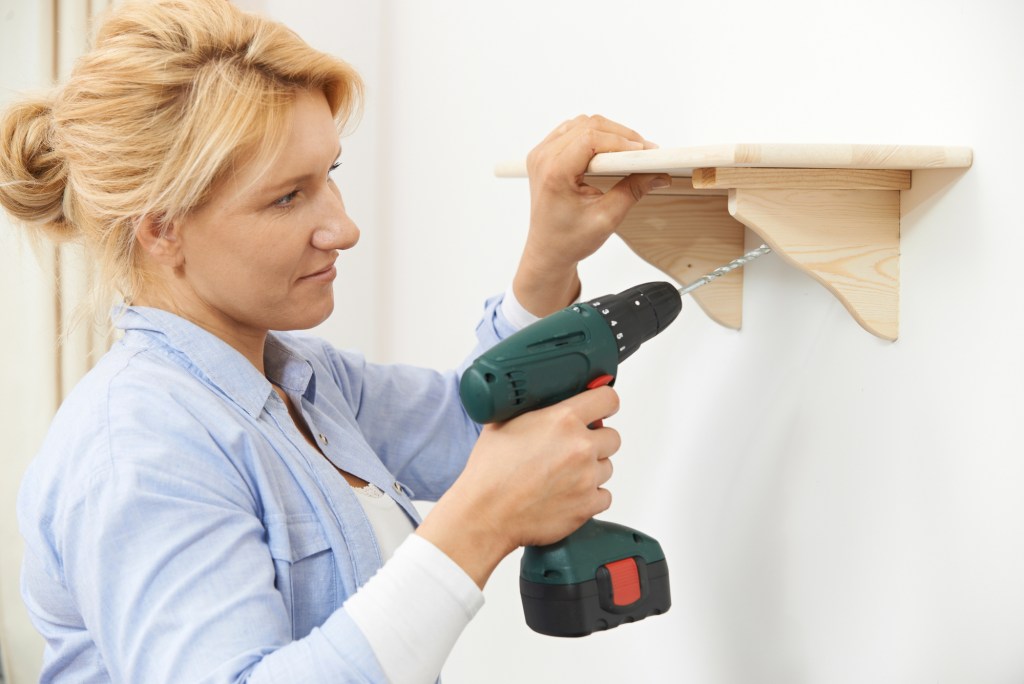
Choosing the right type of shelf is essential, especially if you’re a beginner in DIY projects. Opt for a relatively straightforward shelving system, and locate a reliable tutorial online to guide you through the process meticulously. A spirit level and a pencil will prove invaluable during installation; be sure to use them effectively. Don’t forget to inspect the wall for any pipes or wires before you start drilling!
Unclogging a U Bend
Start by turning off the water supply and placing a bowl beneath the U bend to capture any dripping water. Gently unscrew the fittings at both ends and remove the U bend. Clean it using a bucket of warm soapy water, taking care not to lose any washers. Once the cleaning is complete, reattach it to the plumbing, and you’re finished!
Fitting Blinds
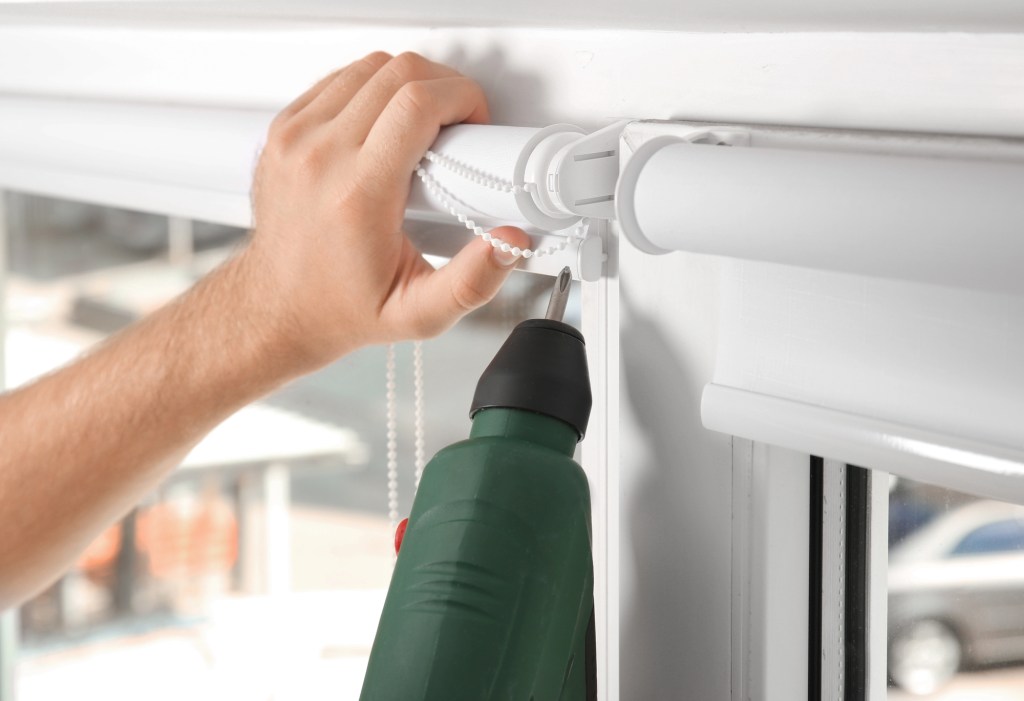
When installing blinds outside of the window recess, ensure that the brackets on both sides are placed equidistantly. If you’re installing them inside the recess, it’s crucial to leave ample space for the blind to operate freely once the brackets are in place. Adhere to the provided fitting instructions carefully, take your time working on it, and finally step back to appreciate the results of your effort.
Replacing Silicone Sealant
The longevity of silicone sealant isn’t infinite, and eventually, it will require replacement. Instead of hiring someone, consider attempting this task yourself. Gather a silicone remover and smoother tool, some fresh sealant, and a cartridge gun. Read the instructions on the sealant remover, clean the surface thoroughly, and once dried, apply the new silicone, finishing with the smoother for a neat look.
Adjusting Sticking Doors
To identify where a door might be sticking, gently close it a few times and observe the edges. Modifications can often be made to the hinges, but if that fails, you might need to sand or plane it down slightly, depending on the amount of wood that needs to be removed. It’s advisable to shave off only small quantities at a time to avoid excessive removal.
Cleaning Gutters
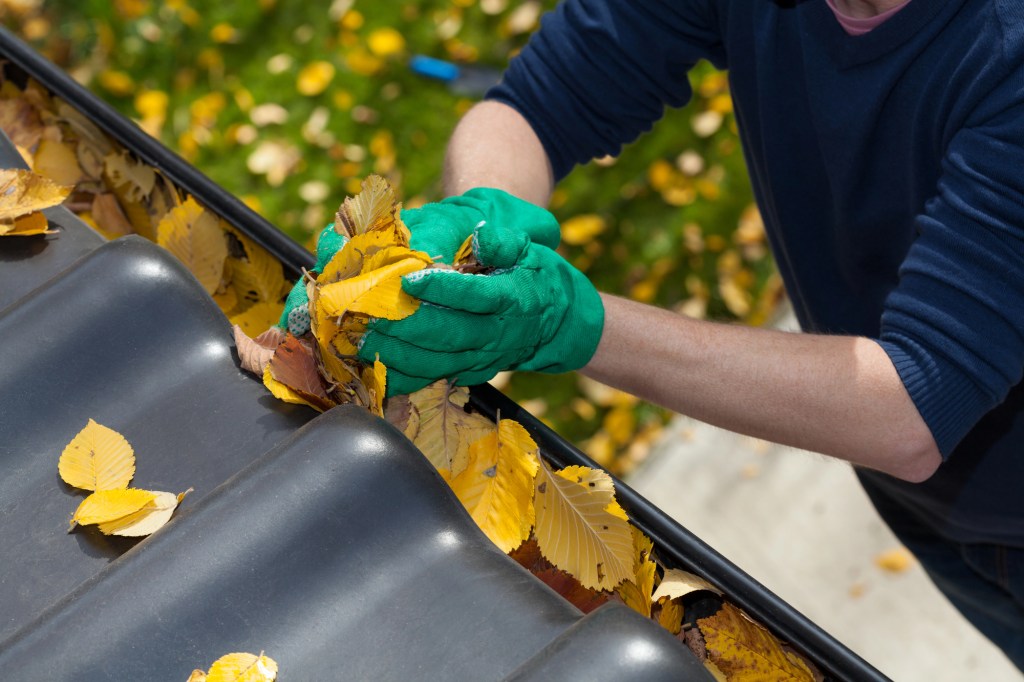
This task is best tackled by two people: one should clear out the gutters while the other stabilizes the ladder. Use waterproof gloves, attach a bucket to the ladder, and use a scoop—like a cut-off plastic milk container—to gather the debris. Make sure to move the ladder along the gutter as necessary, and avoid overreaching. While cleaning, check the overall condition of your gutters, brackets, and downpipes.
Filling Cracks or Holes
Start the process by cleaning the area with sugar soap to enhance adhesion for the filler. For minor internal cracks, opt for a quick-drying filler. Apply the filler using a flexible knife, ensuring you push it into the crack and removing any excess. After it dries, sand it down and wipe the area with a damp cloth to eliminate any dust.
Assembling Flat Pack Furniture
The instructions accompanying flat pack furniture can often be daunting due to the plethora of fixings included. However, by dedicating time and closely following the guidelines, success is almost guaranteed. Sort all screws, dowels, and cam nuts into groups, and lay out the components according to the illustrated diagrams, making sure to check their orientation. Work steadily and diligently for optimal outcomes.
Changing Door Handles
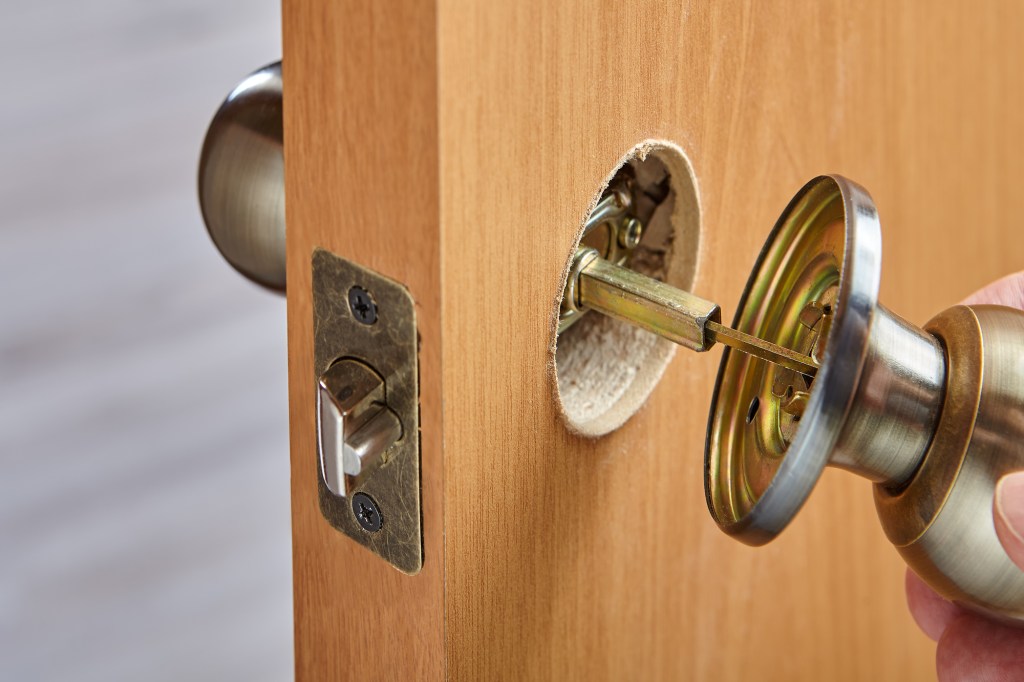
Regardless of whether your handles feature back plates, roses, keyholes, or thumb locks, changing them is quite doable with just a screwdriver or two. To avoid the need for filling screw holes, select a new handle that is similar in size and shape to the existing one. Follow the instructions for your new handles closely and take care to touch up any newly exposed areas.
Fixing Dripping Taps
Begin by turning off the water either under the sink at the isolation ball valve or at the main stopcock. Drain the remaining water by letting the tap run, then remove the tap head. Using an adjustable spanner, loosen the headgear nut. Inside this assembly, you will find the washer; take out the old one and replace it with a new one before reassembling the tap. Finally, turn on the water to check if the issue is resolved.